Quick Start
Welcome to VergeLink! In this guide, we'll walk you through the basic steps on how to configure your first device using the vergelink.io configuration portal.
Devices Overview
Depending on your VergeLink "Device Type" your device is automatically provisioned with an onboarding token for your company's VergeLink instance (Also called "tenant"). This means that as soon as you have connected to your device to the internet and powered it up, it will be visible on the VergeLink configuration panel.
If your device is setup, you can navigate to vergelink.io and login using your E-Mail address and password.
On the device list you can see all devices connected to your VergeLink Tenant.
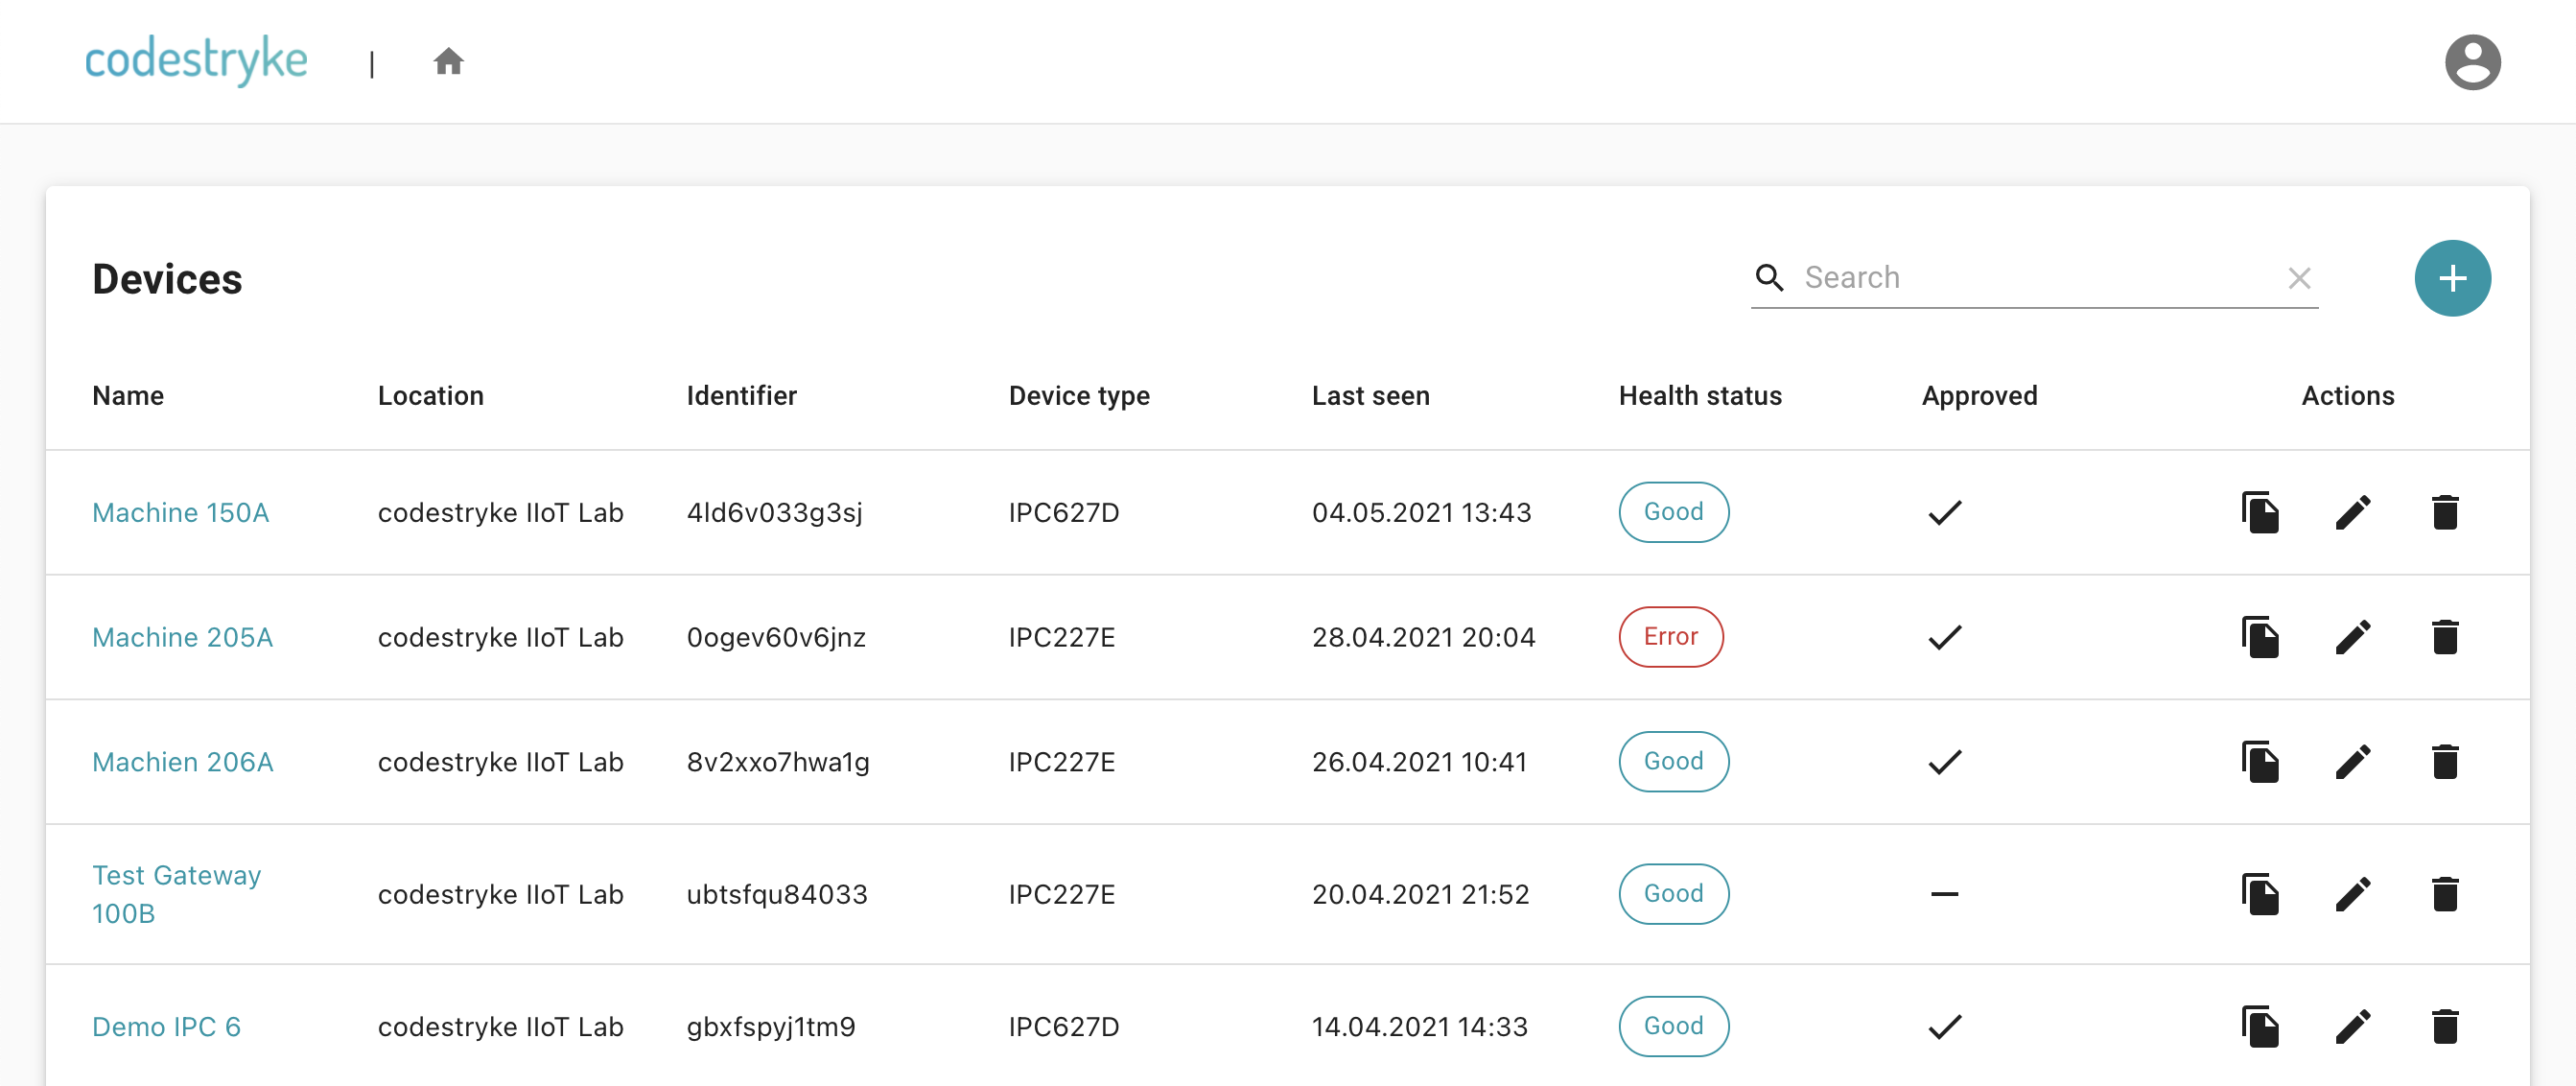
When a new device registers itself to the your VergeLink tenant it needs appears as not "approved" this means that the device can't read any configuration from the configuration server yet. To allow a device to fetch your configuration you need to edit it (using the Pen icon) and set the checkbox in the "Approved" column - after you save the device (using the checkmark icon), the device is ready to be configured. To configure your device, click on the device name (highlighted in light blue).
Manually Configuring Data Sources
On the device view you can configure different field devices as data sources. VergeLink currently supports OPC UA, S7 Communication, Modbus TCP & the IFM VSE Protocol. Depending on your hardware VergeLink also supports Modbus RTU. In this example we will configure an OPC UA data source.
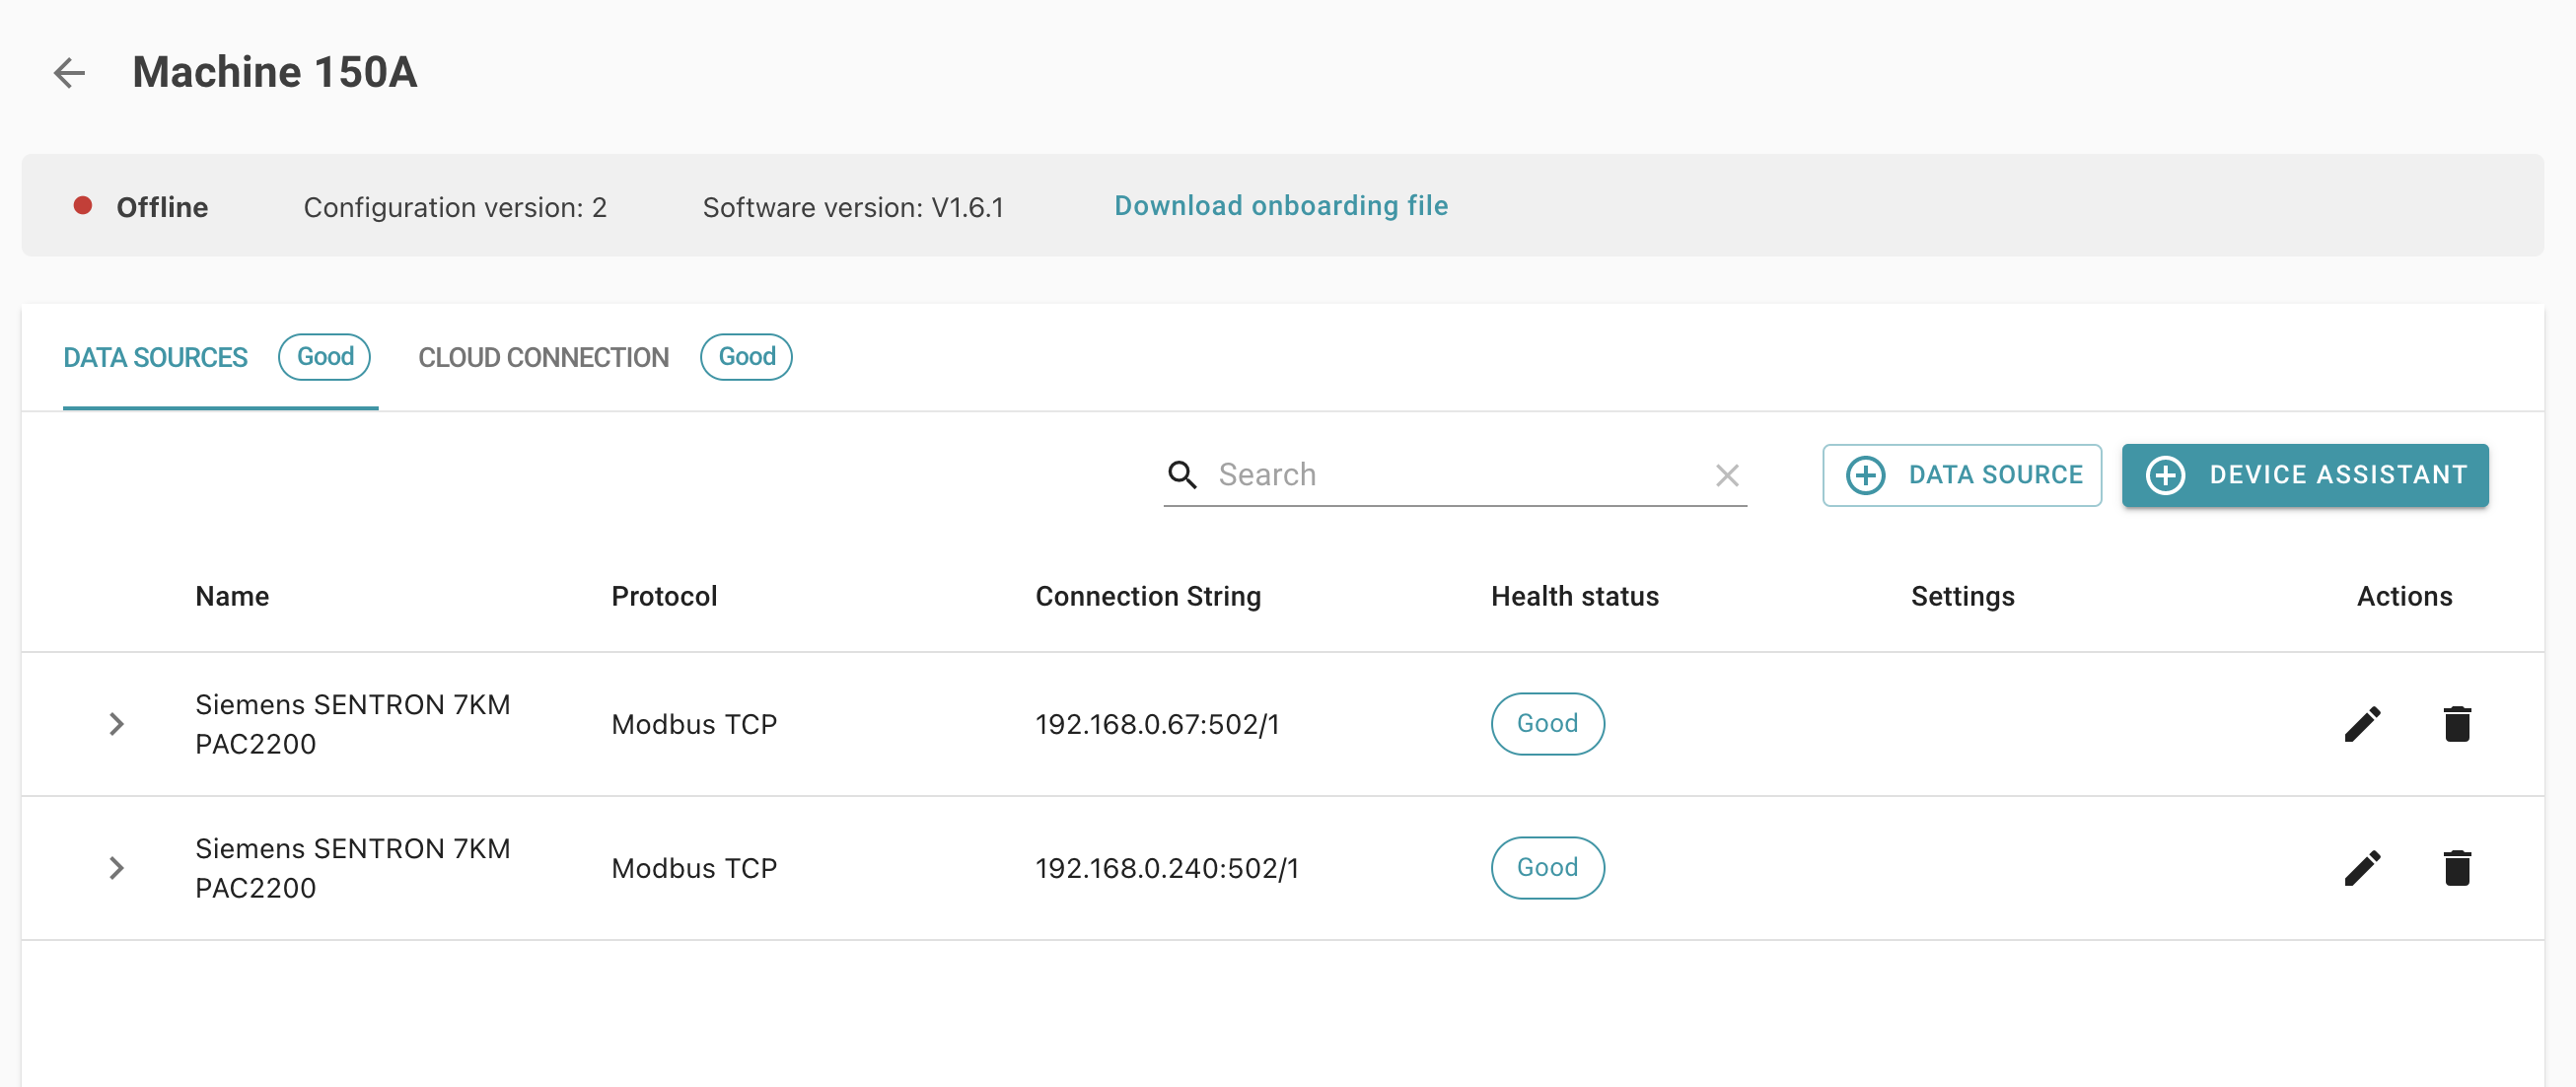
To create a new data source, click on the Add (+ DATA SOURCE) button on the right in the Data Sources tab. After a new table row appears you can select OPC UA in the Protocol dropdown. Then you can enter the details of your OPC UA field device:
- Name: The name of your field device (Example:
MainPLC1) - Connection String: Device address with the following structure:
opc.tcp://<device IP address>:<port>(Example:opc.tcp://192.168.0.100:4840)
In the settings column you can configure the OPC UA Server's Username & Password (if applicable). After you setup the data source you can configure the underlying data points by clicking the Add (+) Button below the data source. For each data point you can enter the following details:
- Name: The (VergeLink internal) name of your data point. This name will be used as an identifier when sending data to the cloud. (Example:
TemperatureSensor-B100) - Unit: The unit of the data point (Example:
°C) - Address: The OPC UA address of the data point (Example:
ns=3;s="E2E_OPC_DB_Data"."b100temperatureSensor") - Frequency: Interval in which the data point should be sent to the cloud. Click save (✓) to add the data point.
Device Status Bar

Online Status
This section indicates the online status of the device. When the device is offline or disconnected from the system, this information displays the timestamp of the last recorded activity.
Identifier
The identifier represents a unique code or name assigned to the specific device or entity within the system. It serves as a distinct identifier for referencing and identifying the device among others in the system.
Configuration Version
In the picture above the '2' represents the latest configuration version. The configuration version is incremented with each applied change, allowing for easy tracking of modifications.
The number in the round brackets '(1)' represents the active configuration, that has been downloaded and successfully applied by the VergeLink Runtime. When devices are online, they automatically synchronize with the latest configuration version.
Software Version
The software version indicates the particular release of the VergeLink Runtime installed on the device. It represents the specific version number, along with any accompanying subversions or updates.
Cloud Connection
After you setup your data sources, you can configure the connection to the cloud, for this you can switch to the "Cloud Connection" register.
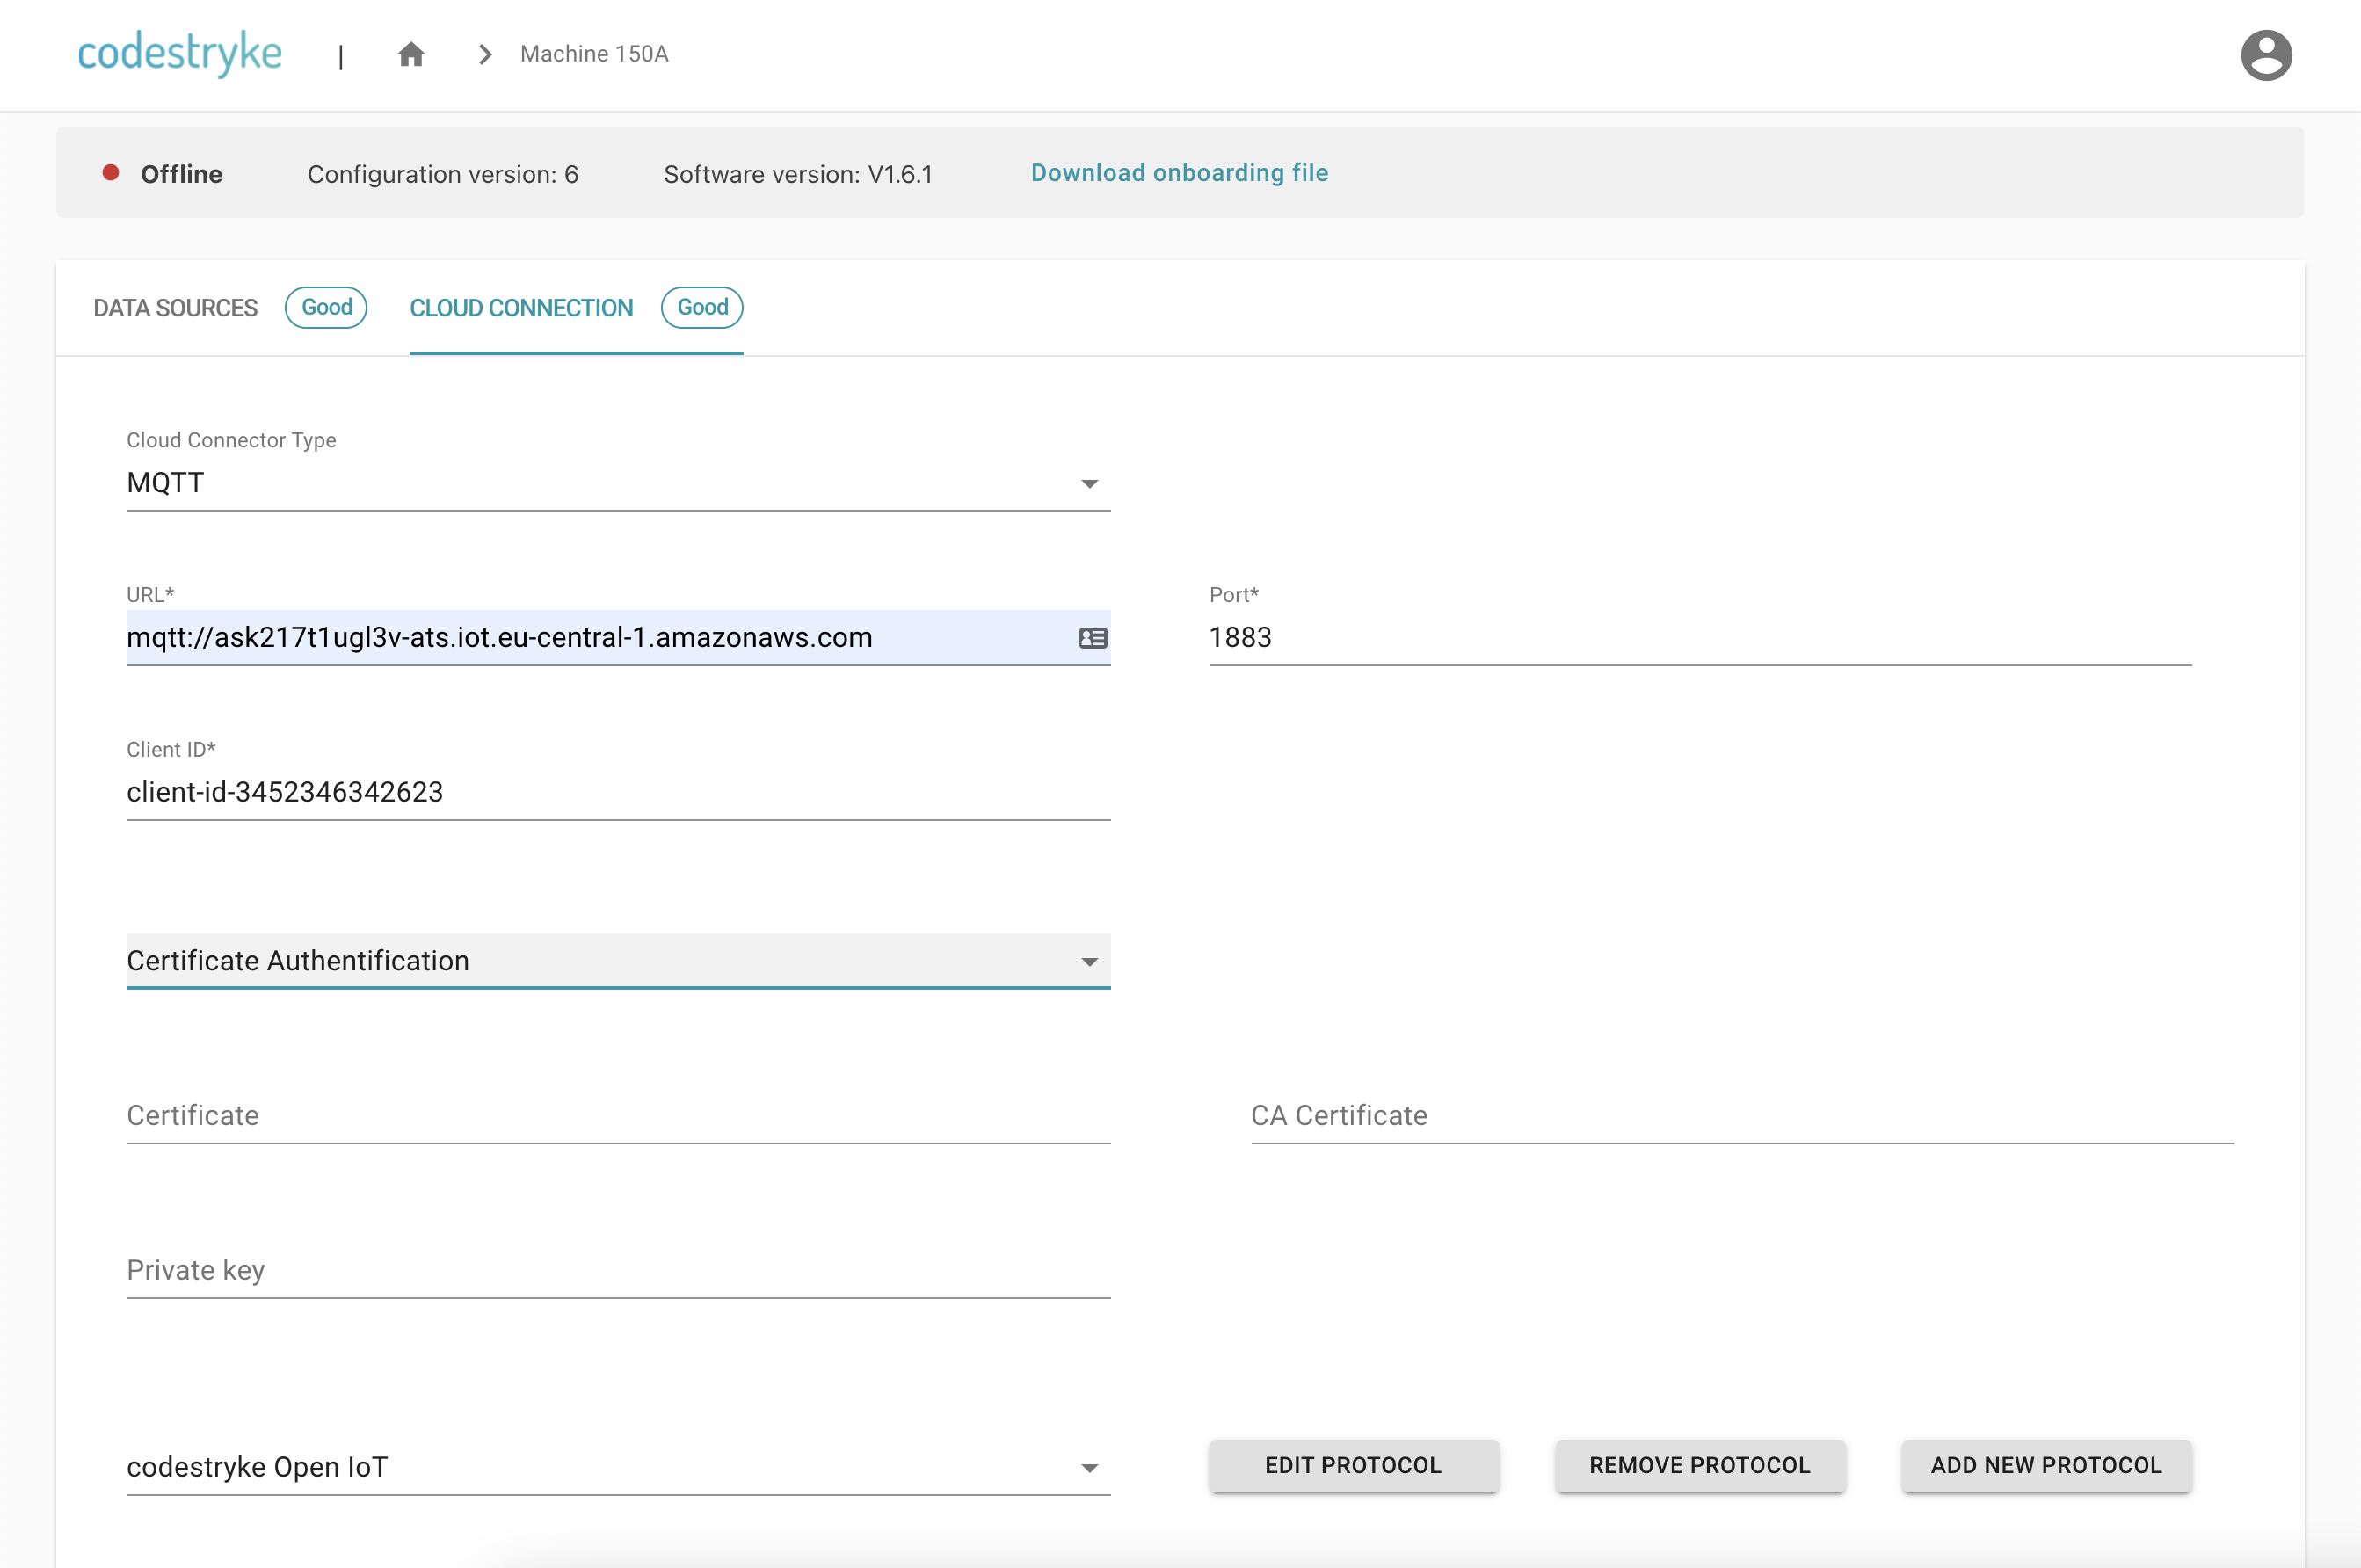
In the cloud connector dropdown you can choose between MQTT and MindSphere (REST). For this example we will configure an MQTT Cloud Connector:
URL: The url has the following structure mqtt://<endpoint> or mqtts://<endpoint> for encrypted communication (Example: mqtt://ask217t1ugl3v-ats.iot.eu-central-1.amazonaws.com)
Port: MQTT broker port (Example: 1883 - default or 8883 - encrypted communication )
Client-Id: The MQTT client id (Example: machine-150a - Here you can also use templating)
Authentification: Choose between User/Password Authentication or Certificate Authentication)
Protocol: The MQTT payload format, here you can choose between existing templates or create and configure your own
After you click the "Apply" button your cloud connection configuration is completed. The VergeLink device will now fetch the configuration and start sending data to your MQTT broker.